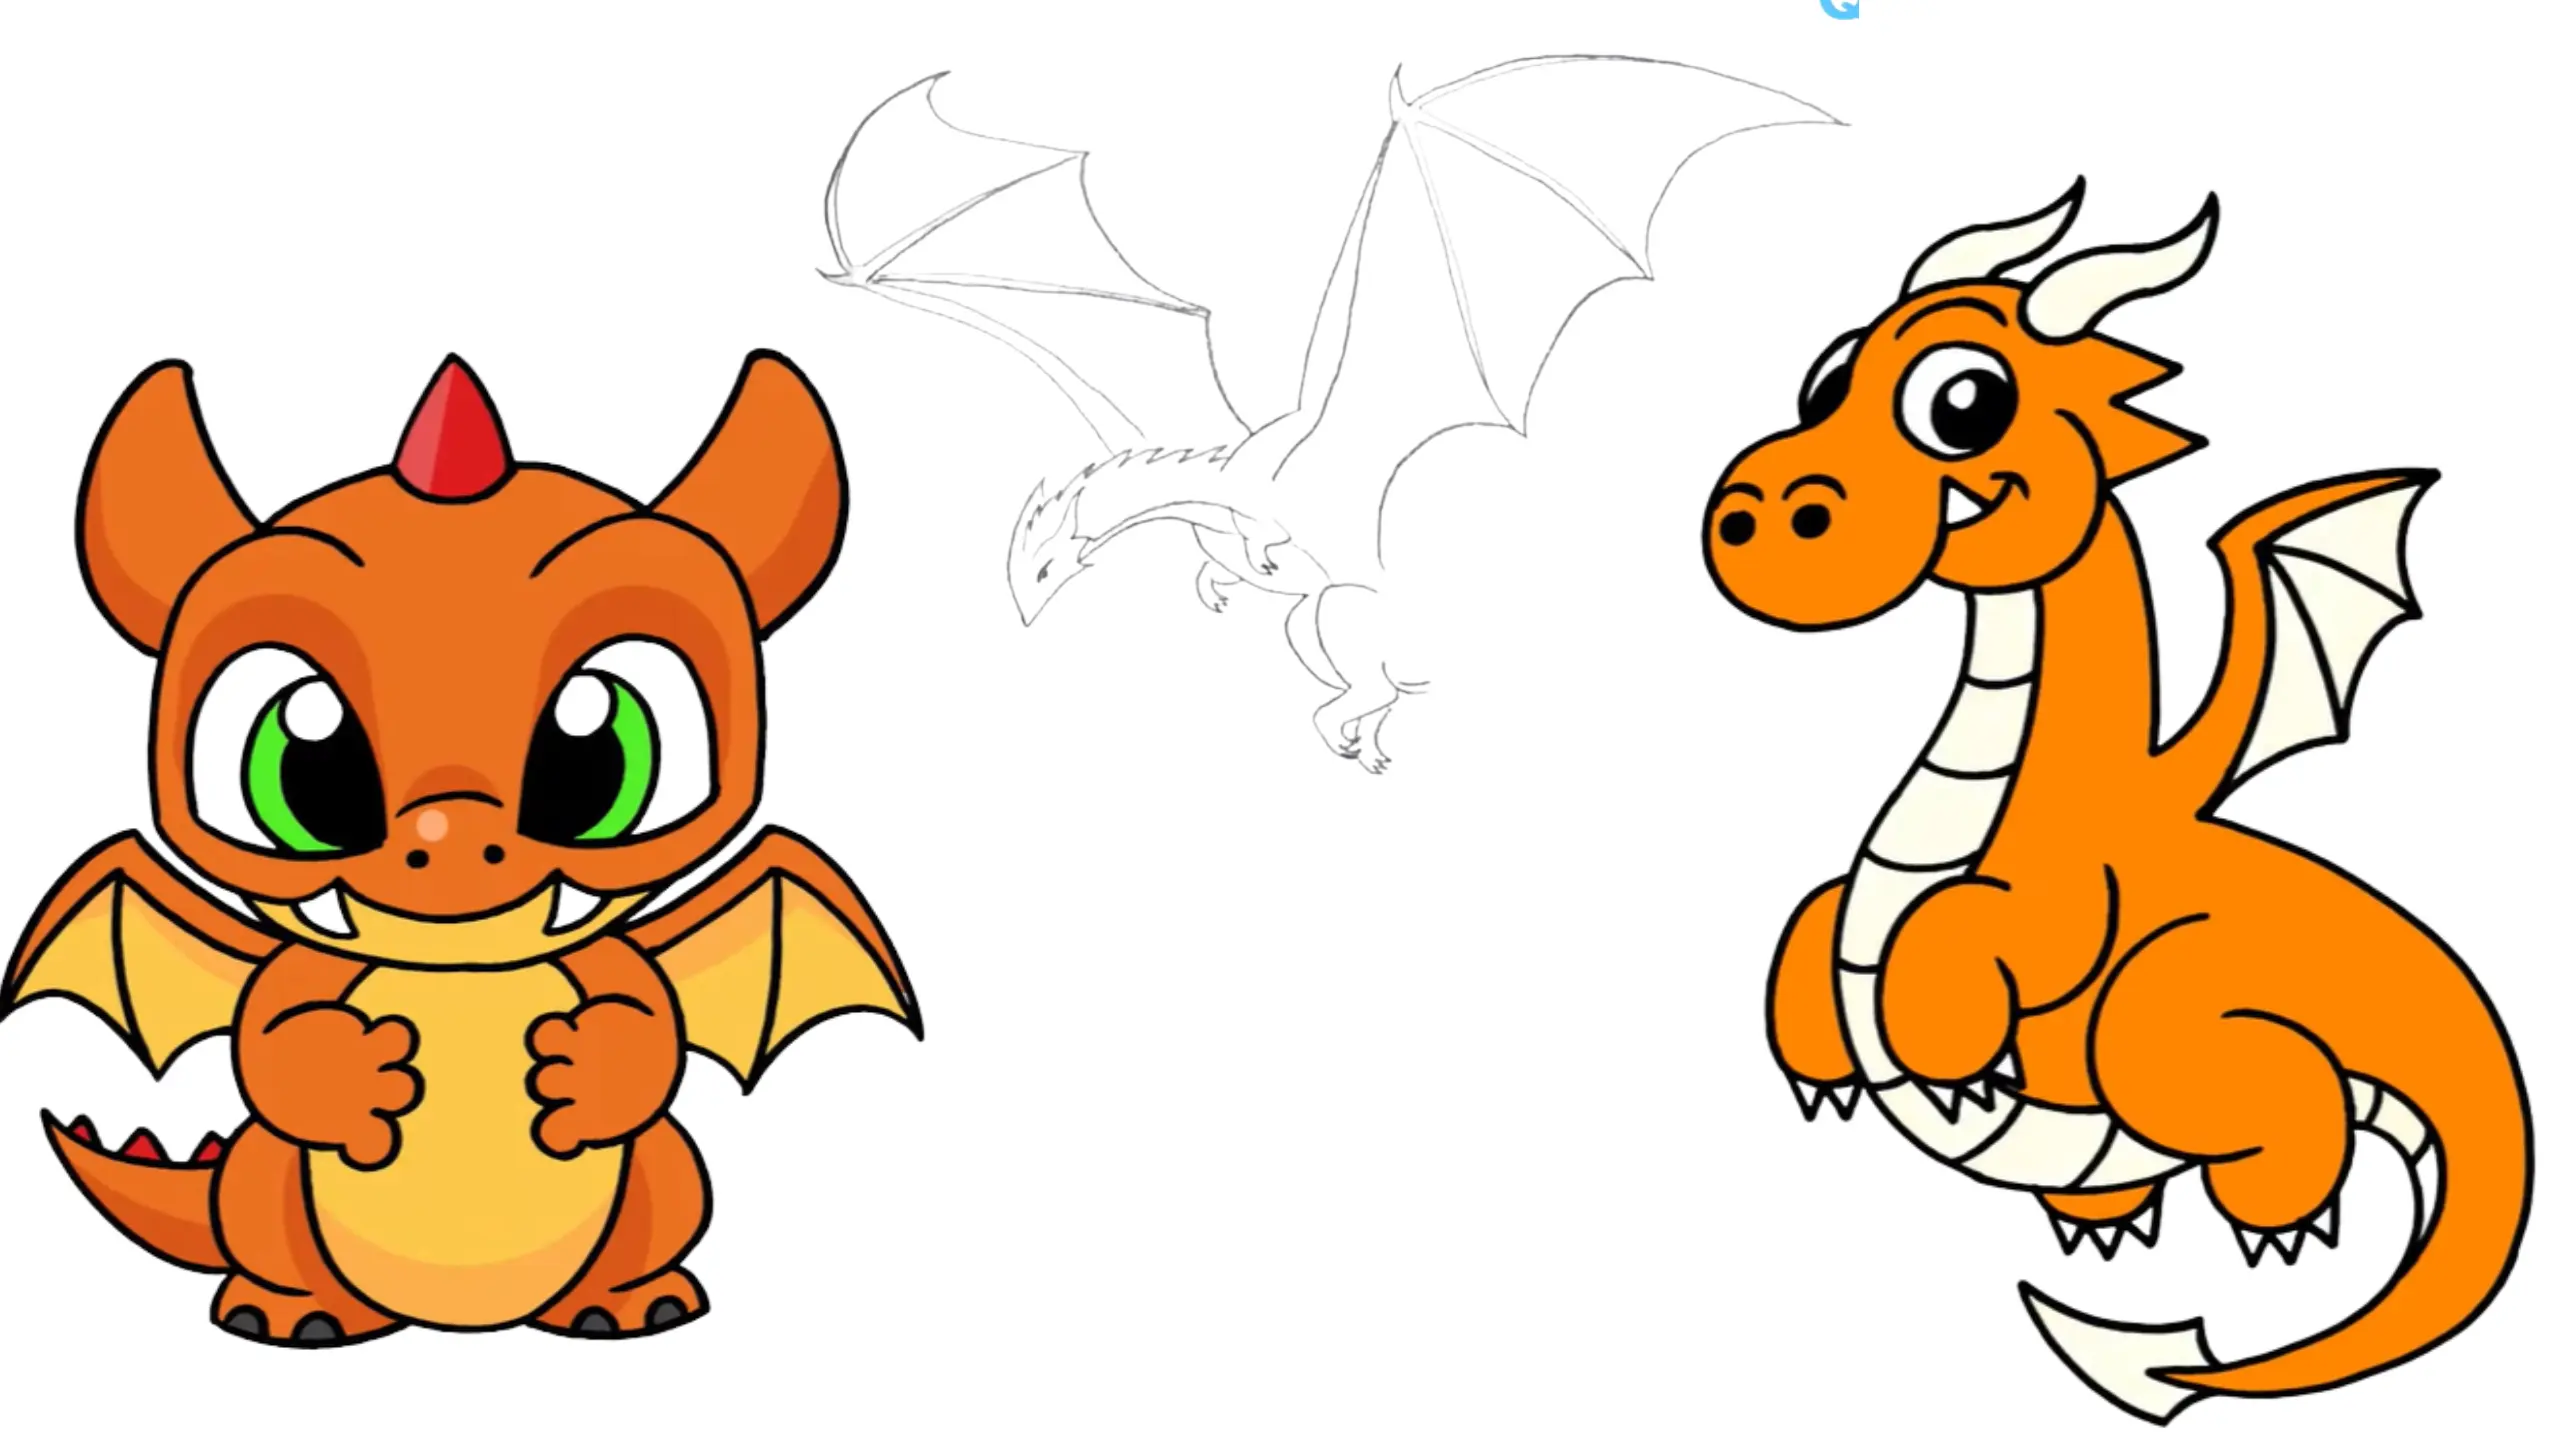
Dragons are amazing creatures that spark our imagination. Depending on how you picture them, they can be significant with wings or long and snake-like. In this guide, we’ll go over the basics of drawing dragons so you can create your own. There’s no right or wrong way to draw a dragon—it’s all about letting your creativity bring these magical creatures to life!
Below is a guide to drawing a dragon step by step.
How To Draw a Dragon | Drawing Tutorial for Kids.
Step 1: Drawing the Eye.
- Start by drawing a circle for the eye.
- Inside the eye, draw a smaller circle near the bottom-right corner for the pupil.
- Add a tiny circle in the top-left of the pupil for the highlight.
- Fill the outside of the pupil in black.

Step 2: Drawing the Beak and Mouth.
- To the left of the eye, draw the front of the beak with a curved line going down and out.
- Curve around the beak, coming down towards the bottom.
- Pull the line up towards the corner of the mouth and curve it back up.
- Add another curve to emphasize the mouth shape.
- Draw a small bracket at the end of the mouth.
- Add a fan shape along the side of the mouth, curving up and back down.

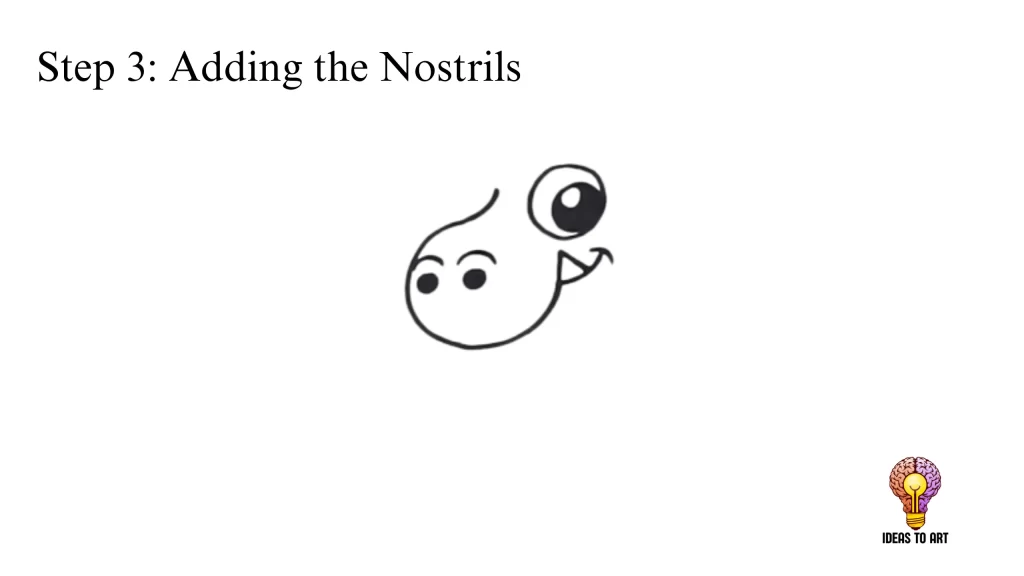
Step 3: Adding the Nostrils.
- Draw two small circles for the nostrils—one on the left and one on the right.
- Fill the nostrils in black.
- Add a small fold above each nostril with curved lines.
Step 4: Outlining the Head.
- Draw the jawline from below the beak, curving around the jaw and pulling it back in.
- Outline the back of the head by curving the line from the front, rounding it up, and extending it toward the back.
- Add a socket for the horn by drawing a curve in and back out.

Step 5: Adding the Eyes and Details.
- Draw the left eye tucked behind the side of the head.
- Add a pupil with a slight highlight and fill it in black.
- Add a fold above the right eye with a curved line.

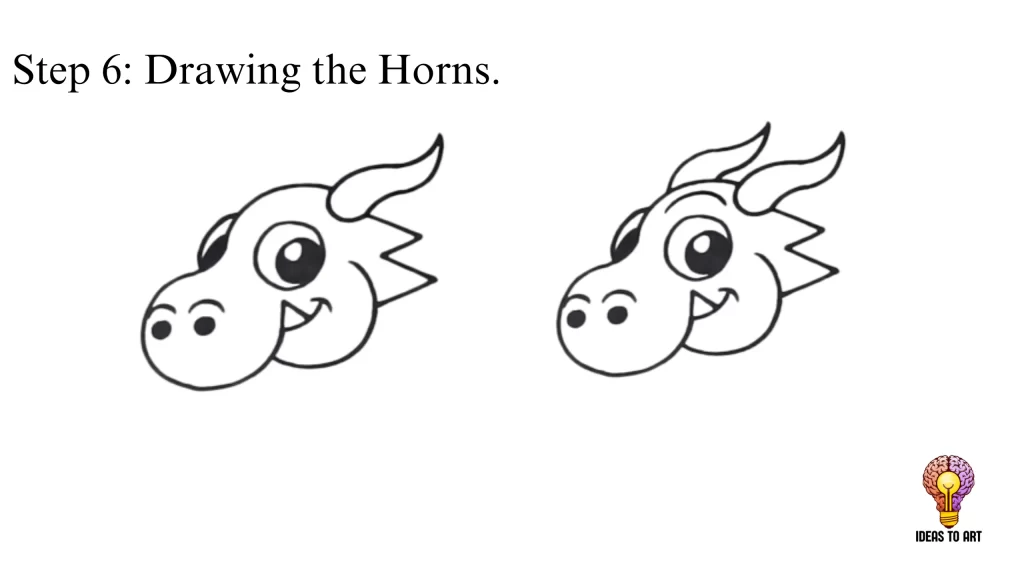
Step 6: Drawing the Horns.
- Add the first horn starting from the socket, curving up and out, then tapering it back toward it.
- Draw the second horn behind the head with a similar shape, curving it up and back.
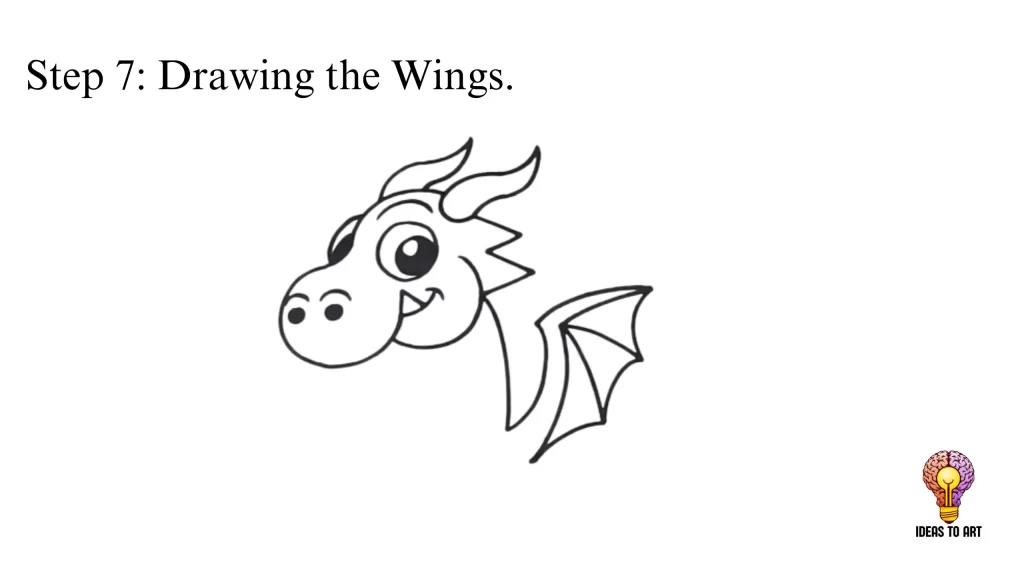
Step 7: Drawing the Wings.
- Draw the base of the wing curving out and back in.
- Extend the wing upward, curving it out towards the tip.
- Taper it back toward the body, making it thicker at the base.
- Add two spines inside the wing by drawing curved lines from the base outward.
- Connect the points with smooth curves to define the wing shape.
Step 8: Drawing the Neck And Body.
- Extend a line from the side of the jaw to outline the neck, curving it down towards the wing.
- Start under the chin and outline the body by curving the line down and rounding it outward.

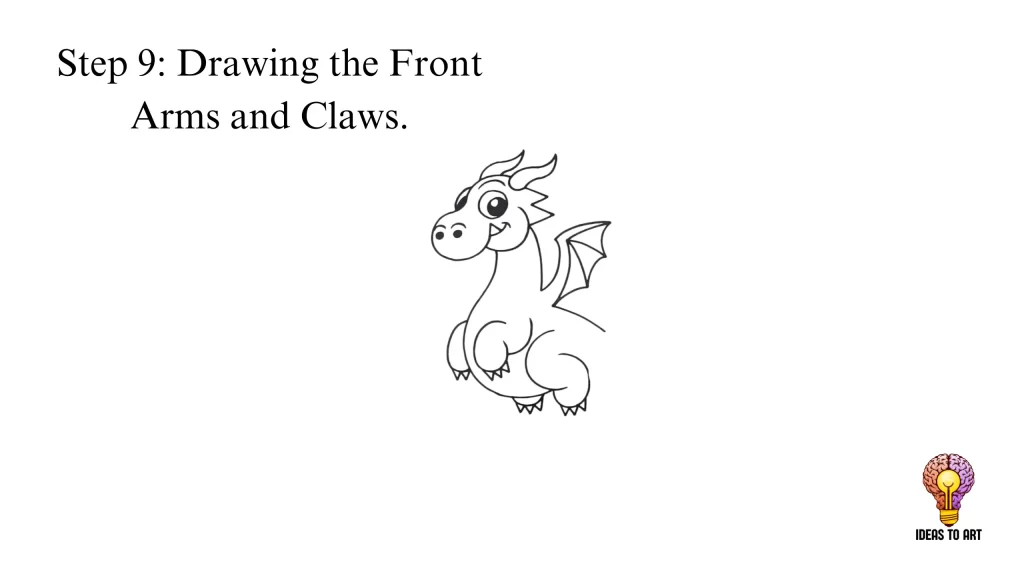
Step 9: Drawing the Front Arms and Claws.
- Extend the front arm from the body, curving it out and rounding it into a hand.
- Add the back of the arm, curving it back into the body.
- Draw the second arm on the left side, tucking it behind the body.
- Add claws to the hands by drawing small “V” shapes.

Step 10: Drawing the Hind Legs and Feet.
- Draw the hind leg from the body, curving it outward and back in.
- Add the foot below the bent leg with a rounded heel.
- Draw claws on the foot with small “V” shapes.
- Add the second back foot tucked behind the body and repeat the claw details.
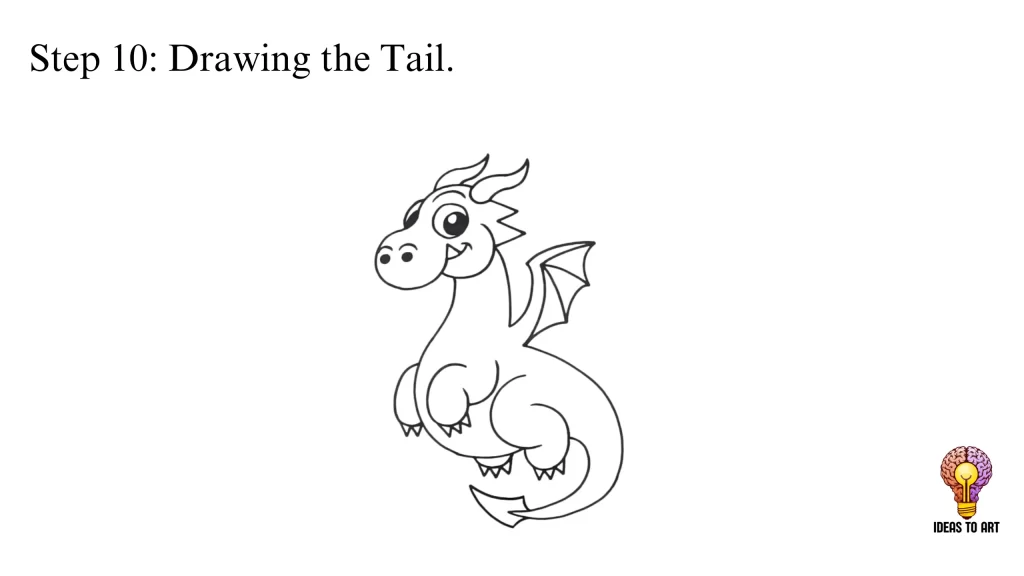
Step 10: Drawing the Tail.
- Extend the tail from the back leg, curving it outward and around to the left.
- Taper the tail as it narrows toward the tip.
- Finish the end of the tail with a series of curved lines, adding some sharp points for detail.
Step 11: Adding the Body Trim and Texture.
- Add a trim across the front of the body, starting under the jaw and following the curve of the body.
- Add similar trim along the back of the body and tail.
- Add texture to the belly with curved lines going up and down, creating a ribbed effect.

Final Step: Completing the Dragon and Add Colors.
- Double-check all details and refine any lines.
- Ensure that the horns, wings, and claws are symmetrical and proportional.
- Add color to whatever you want.

Your cute cartoon dragon is now complete.
Draw a Flying Dragon step-by-step.
Step 1 Draw Face.
Start from the face. Draw the face and eye of a dragon using lite pencil.

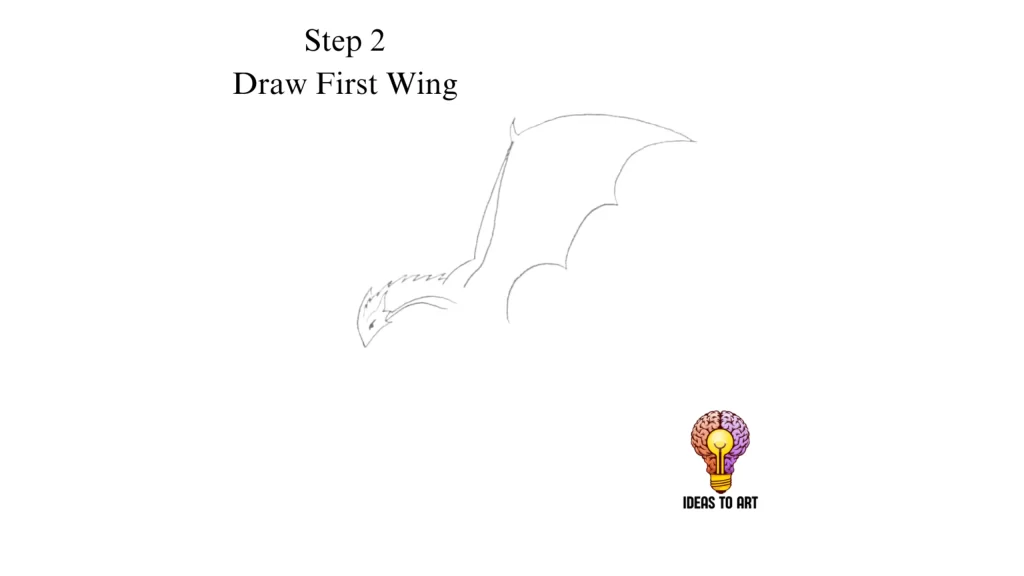
Step 2. Draw First Wing.
Now, after drawing a face, the next move is to draw a wing.
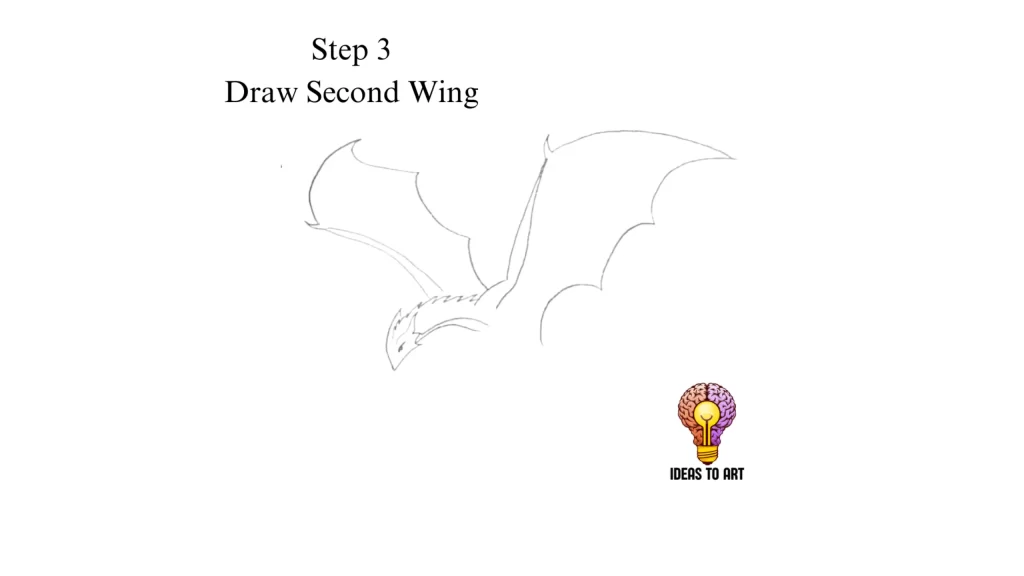
Step 3. Draw a second wing.
Now, draw a second wing to complete the pair of wings.
Step 4. Add Wings Veins.
Add the wing veins in both wings of a dragon.

Step 5. Draw a front Feet.
After adding veins in the wing, the next step is to make the feet of the dragon just under the wings of the dragon.

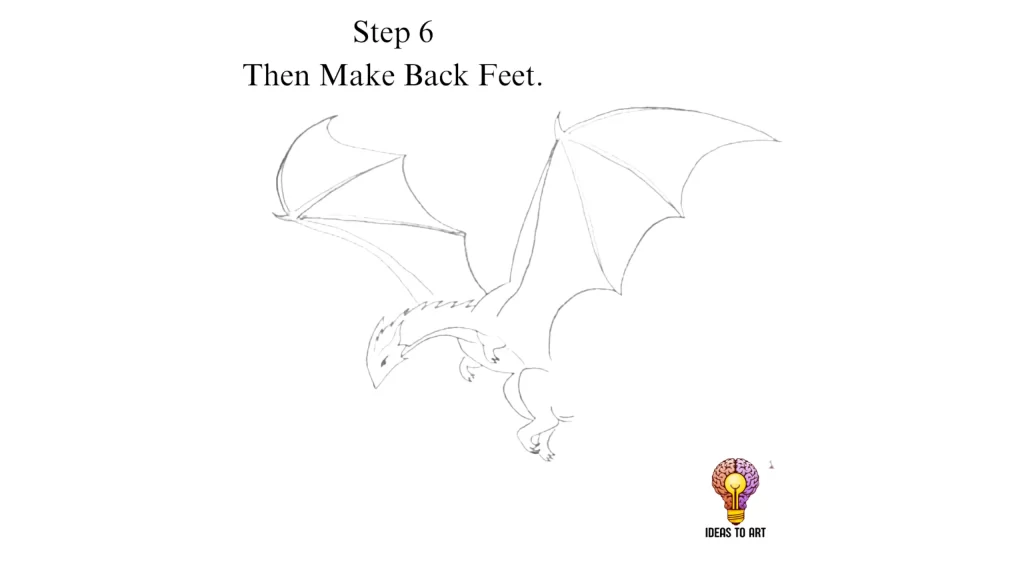
Step 6. Add Back Feet.
Now draw a back feet.
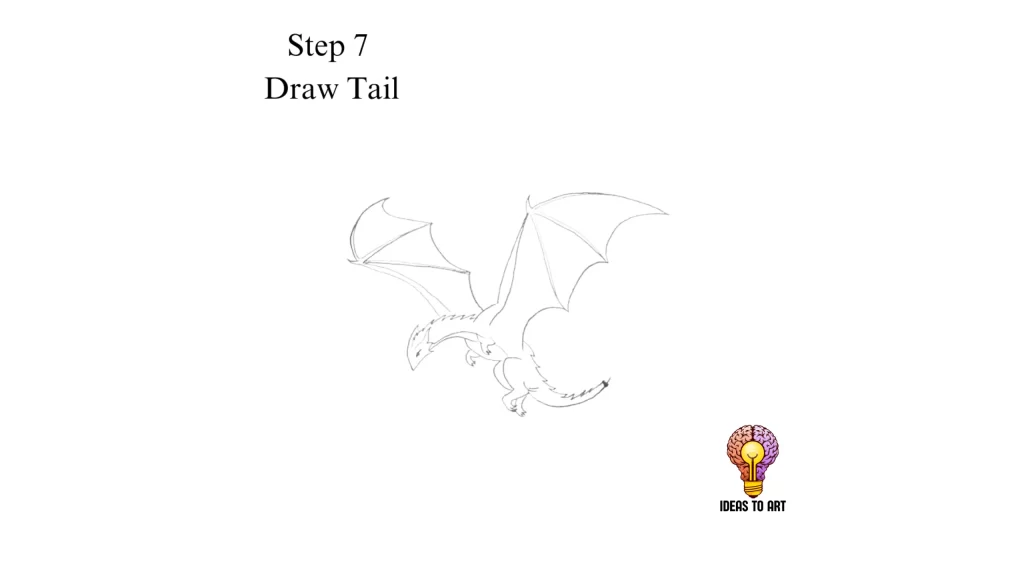
Step 7. Draw Tail.
- Now, draw the tail of a dragon.
- After drawing the tail, your dragon drawing is complete;
- fill or add color whatever you want
Cartoon Dragon Drawing Guide step-by-step.
Step 1. Draw Eyes.
Now, the first step is to draw the eyes of the dragon using a marker.

Step 2. Draw Mouth.
The Second step is to draw the mouth of a dragon.

Step 3. Add Teeth.
After making a dragon’s mouth, add two teeth to each side.

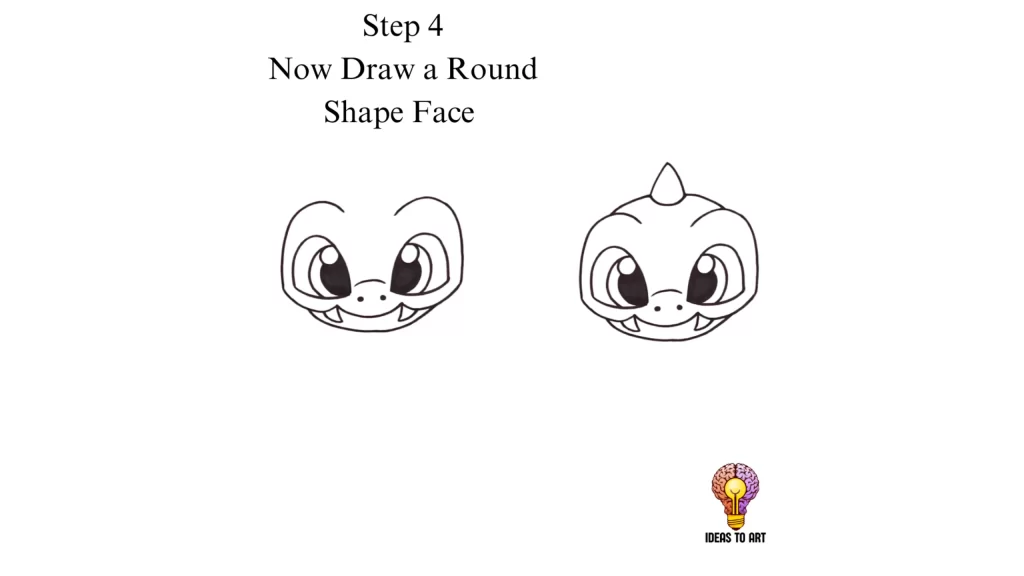
Step 4. Now Draw Face.
When you make a dragon mouth, it is time to make the round shape face of a dragon.
Step 5. Draw Ear.
Now draw an ear of a dragon on each side.

Step 6. Draw Hand.
Now, the sixth step is to draw the hand of a dragon.

Step 7. Draw Stomach.
Now, the seventh step is to draw the oval-shaped stomach of a dragon.

Step 8. Draw Feet.
Now, draw both feet of the dragon and add the nails to the feet.

Step 9. Draw Tail.
Now, the nine-step is to draw the tail of the dragon.

Step 10. Draw Both Wings.
The 10th and last step is to draw the wings of a dragon.

Step 11. Complete the Drawing.
In the picture below, you can see that the dragon drawing is complete.

Step 12. Add Colors.
Now that the drawing is complete, it’s time to add color to it. Whatever you want, my choice of color is below the picture.

Also Read: Unique Mushroom Drawing Ideas and Perspectives for All Skill Levels
Also Read: 3 Easy Methods to Draw a Lily Flower for Beginners
Also Read: Easy Canvas Painting Ideas.

